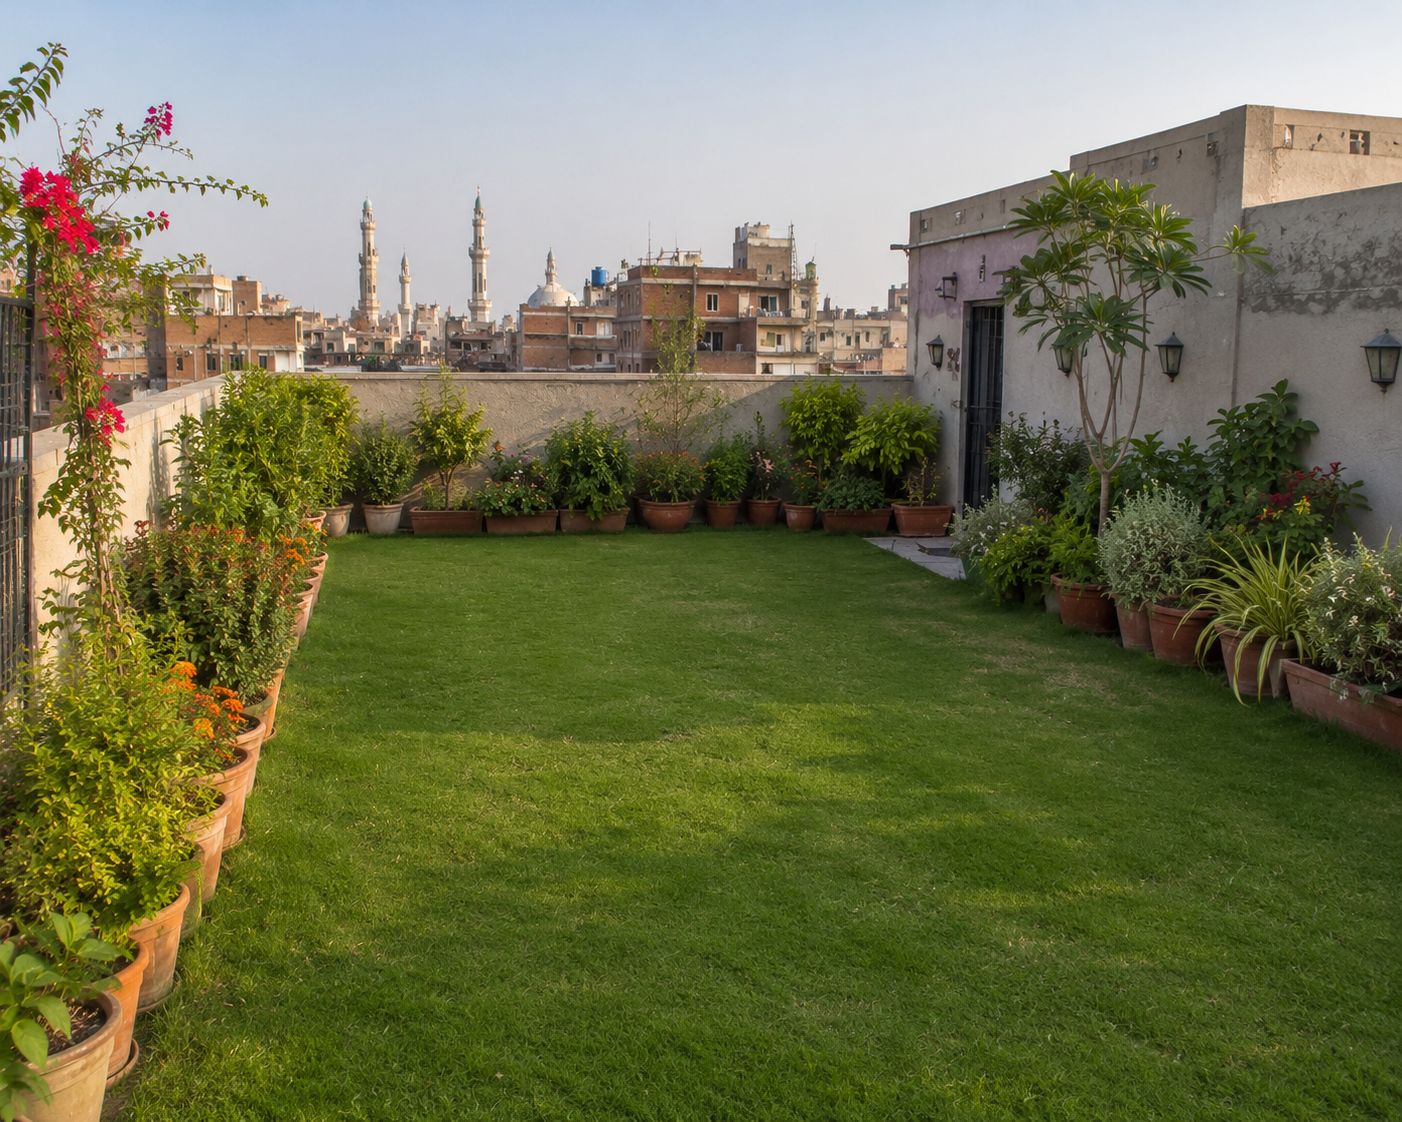
Look up at any city from a high building and you will see the same thing. Flat concrete roofs stretching in every direction, absorbing the sun all day, radiating heat into every room below them from morning until well after midnight. Empty, grey, hot, wasted.
Now imagine those same rooftops covered in green. Vegetables growing in raised beds. Herbs in terracotta pots. Marigolds and chillis in fabric grow bags. A grapevine trained along a trellis. A small table and chairs in the corner where you sit in the evening with something cold to drink, thirty metres above street level, in your own garden.
That is a rooftop garden. And beyond the obvious joy of it, there is a reason it is one of the fastest growing trends in urban living worldwide — one that has nothing to do with vegetables and everything to do with physics, temperature, and your electricity bill.
Here is the complete guide. How to start, what to check, what to grow, and exactly why a rooftop covered in plants changes the thermal experience of every room below it.
The Science First: What a Bare Roof Does to Your Home
Before we talk about building anything, it is worth understanding what your bare concrete or asphalt roof is doing right now.
A concrete roof is essentially a heat battery. All day, it absorbs solar radiation. Surface temperatures on an exposed concrete or dark asphalt roof in full sun can reach 70–80°C (158–176°F) on a hot day — far hotter than the surrounding air temperature. That heat does not stay on the roof surface. It conducts downward through the slab, into the ceiling of the rooms below, and radiates into your living space continuously — including through the night, long after the sun has gone down.
The result is a home that feels significantly hotter than the outdoor temperature, air conditioning units working at maximum capacity to fight the heat coming through the ceiling, and electricity bills that reflect every watt of that effort.
A National Research Council of Canada study measured this directly. On a sunny day, a bare rooftop reached a surface temperature of 70°C (158°F). A rooftop covered with a garden stayed at a moderate 25°C (77°F). The daily temperature fluctuation on the bare roof was 46°C. On the garden roof, it was just 6°C. That stability — that flat, cool surface sitting above your rooms all day — is what changes everything inside.
Research published in multiple studies shows that a 1°C reduction in internal building temperature reduces air conditioning energy consumption by up to 16%. Buildings with rooftop gardens save between 20% and as much as 60% in upper-floor cooling costs in warm climates. Homeowners in Bangalore who added rooftop gardens reported their cooling needs dropped by 5°C during summer. 82% of surveyed rooftop garden owners reported meaningful improvement in indoor thermal comfort. Several reported their air conditioning use dropped significantly or stopped entirely during moderate weather.
This is not marketing. It is heat physics, plant biology, and measured data.
How plants cool a surface:
Plants cool through a process called evapotranspiration — the same mechanism that makes a forest feel cooler than the city around it. Plants absorb water through their roots and release it through tiny pores in their leaves. As that water evaporates, it draws heat energy from the surrounding surface — exactly the same principle as sweating. A rooftop covered in actively growing plants is continuously releasing moisture and drawing heat away from the surface. The soil layer also acts as insulation — slowing the transfer of solar heat through the roof slab into the rooms below.
The result: cooler roof surface. Cooler ceiling above your rooms. Lower indoor temperature. Less cooling required. Lower electricity bill. Every summer, every year, for as long as the garden exists.
Step 01 — Check Structural Capacity Before Anything Else

This is not optional. It is the first step, and skipping it is the only mistake on this list that cannot be fixed later.
Rooftop gardens add weight. A container filled with wet soil, a raised bed, a trough of vegetables after heavy rain — all of this adds load to a structure that was designed to carry a specific maximum. Exceeding that limit creates structural risk.
What to check:
Most residential buildings are designed to support a live load of roughly 150–200 kg per square metre. The actual capacity of your specific building depends on its age, construction type, and condition. A structural engineer can assess this precisely — and it is worth the cost of one professional visit before you invest time and money into a garden.
Key questions to answer before proceeding:
- What is the maximum load per square metre my roof can safely carry?
- Where are the load-bearing points — walls, columns, beams — where weight should be concentrated?
- Is the roof membrane in good condition, or does waterproofing need attention before adding weight?
- Do local building codes or landlord agreements require permission for rooftop structures?
Practical weight management:
The heaviest element in any rooftop garden is soil. Standard garden soil is far too heavy for rooftops — use lightweight potting mix, coco coir, or purpose-made rooftop growing media instead. These mixes weigh 40–60% less than standard soil while providing equivalent nutrition for plants.
Place the heaviest containers — large raised beds, big pots, water storage tanks — directly over load-bearing walls and columns. Keep the centre of open roof spans lighter. Distribute weight evenly rather than concentrating it in one area.
Fabric grow bags are one of the best rooftop container options — they are lightweight even when filled, drain perfectly, and can be moved and rearranged as needed.
Step 02 — Waterproofing and Drainage
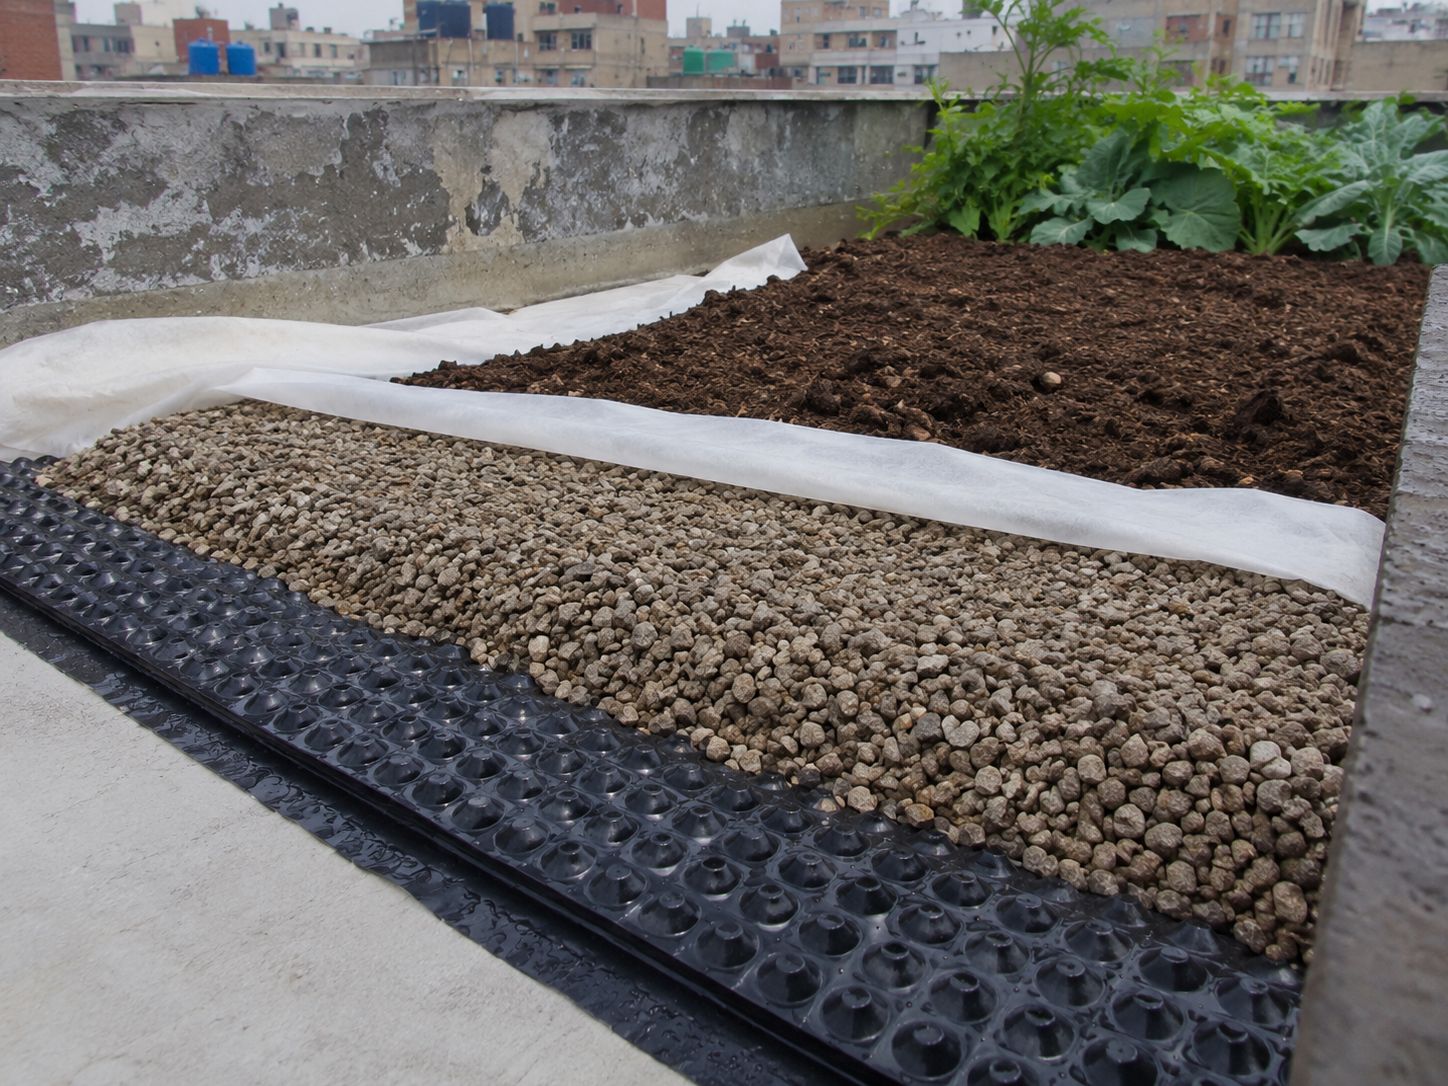
A rooftop garden that is watered regularly and exposed to rainfall introduces water to a surface that was not designed to handle ponding. Without proper drainage and waterproofing, water finds its way into the building below.
Waterproofing:
If your roof membrane is older than 10 years or shows any signs of cracking, blistering, or pooling water, address this before adding a garden. A compromised membrane under a garden full of moisture and soil becomes a slow, expensive problem. A healthy membrane under a garden lasts longer than an unprotected one — the garden shields it from UV degradation and temperature extremes that cause most membrane deterioration.
Container gardens on rooftops with individual pots require less waterproofing intervention than built-in raised beds. If you are using containers exclusively, check that drainage from containers does not pool on the roof surface — all water should flow to existing roof drains without obstruction.
Drainage layers:
If installing raised beds directly on the roof surface, build in a drainage layer between the growing medium and the roof. A 5–7 cm layer of gravel, drainage chips, or purpose-made drainage matting at the base of each bed allows excess water to move freely away from plant roots and toward drains.
Never seal containers on the roof surface without drainage — standing water under containers causes both root rot and roof membrane damage.
Step 03 — Wind, Sun, and Microclimate
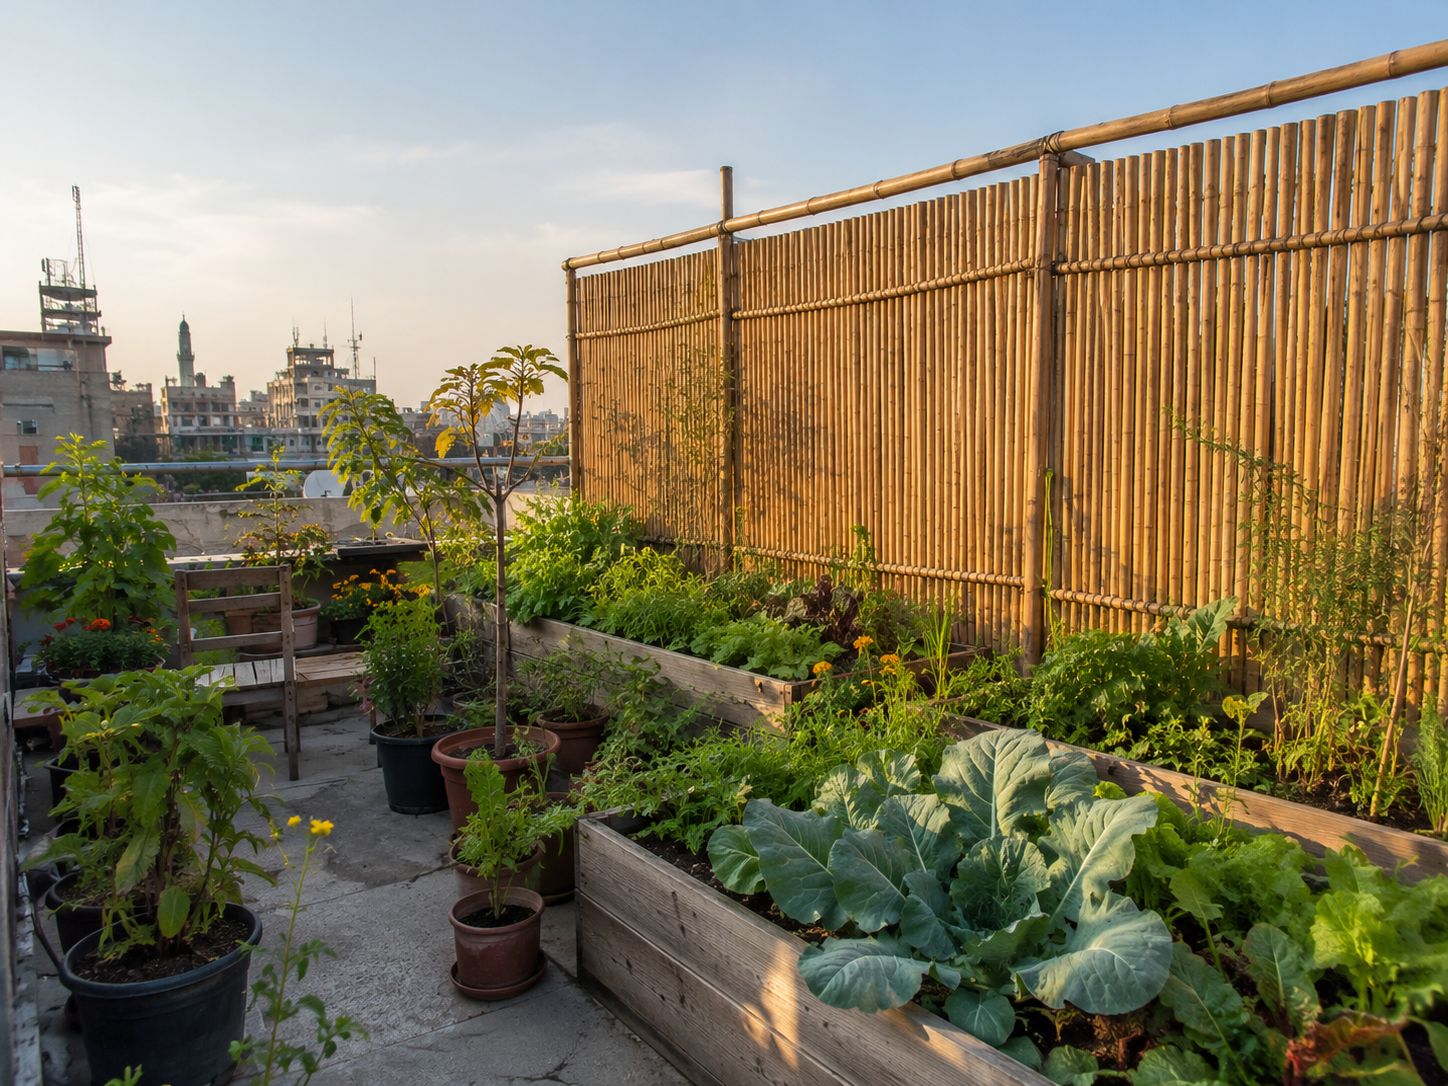
Rooftops are exposed environments. Before you decide what to grow and where, spend time on your roof at different times of day to understand what it actually offers.
Wind:
Rooftops are typically windier than ground level — often significantly so. Strong winds dry out containers faster, damage tall plants, topple lightweight pots, and make the space uncomfortable to spend time in. Before planting anything, identify the direction of the prevailing wind and install windbreaks on the windward side.
Windbreaks can be bamboo screens, woven wicker panels, wooden slatted fences, tall trellises with climbers, or even rows of large robust plants like grasses or robust shrubs. The goal is to reduce wind speed across the growing area, not block all air movement — good airflow still prevents fungal disease and pollinator activity.
Secure all containers so they cannot be tipped by wind. Heavy fabric grow bags, low wide terracotta pots, and containers placed against walls or parapets are most stable.
Sun mapping:
Spend one day noting which areas of your roof get full sun, which are partially shaded by parapets or neighbouring buildings, and how this changes between morning and afternoon. Place sun-hungry plants — tomatoes, chillies, peppers, most fruiting vegetables — in the sunniest spots. Use partial shade areas for leafy greens, herbs, and shade-tolerant plants like coriander and spinach.
Heat management:
Rooftops in warm climates absorb significantly more heat than ground-level gardens. Surface temperatures on unshaded areas of the roof itself can still be intense. Use light-coloured containers — white, cream, or light grey — to reflect heat rather than absorb it. Mulch all containers with straw, dry leaves, or compost to insulate roots and reduce soil temperature. Water in the early morning before peak heat arrives.
Step 04 — Choose Your Container System
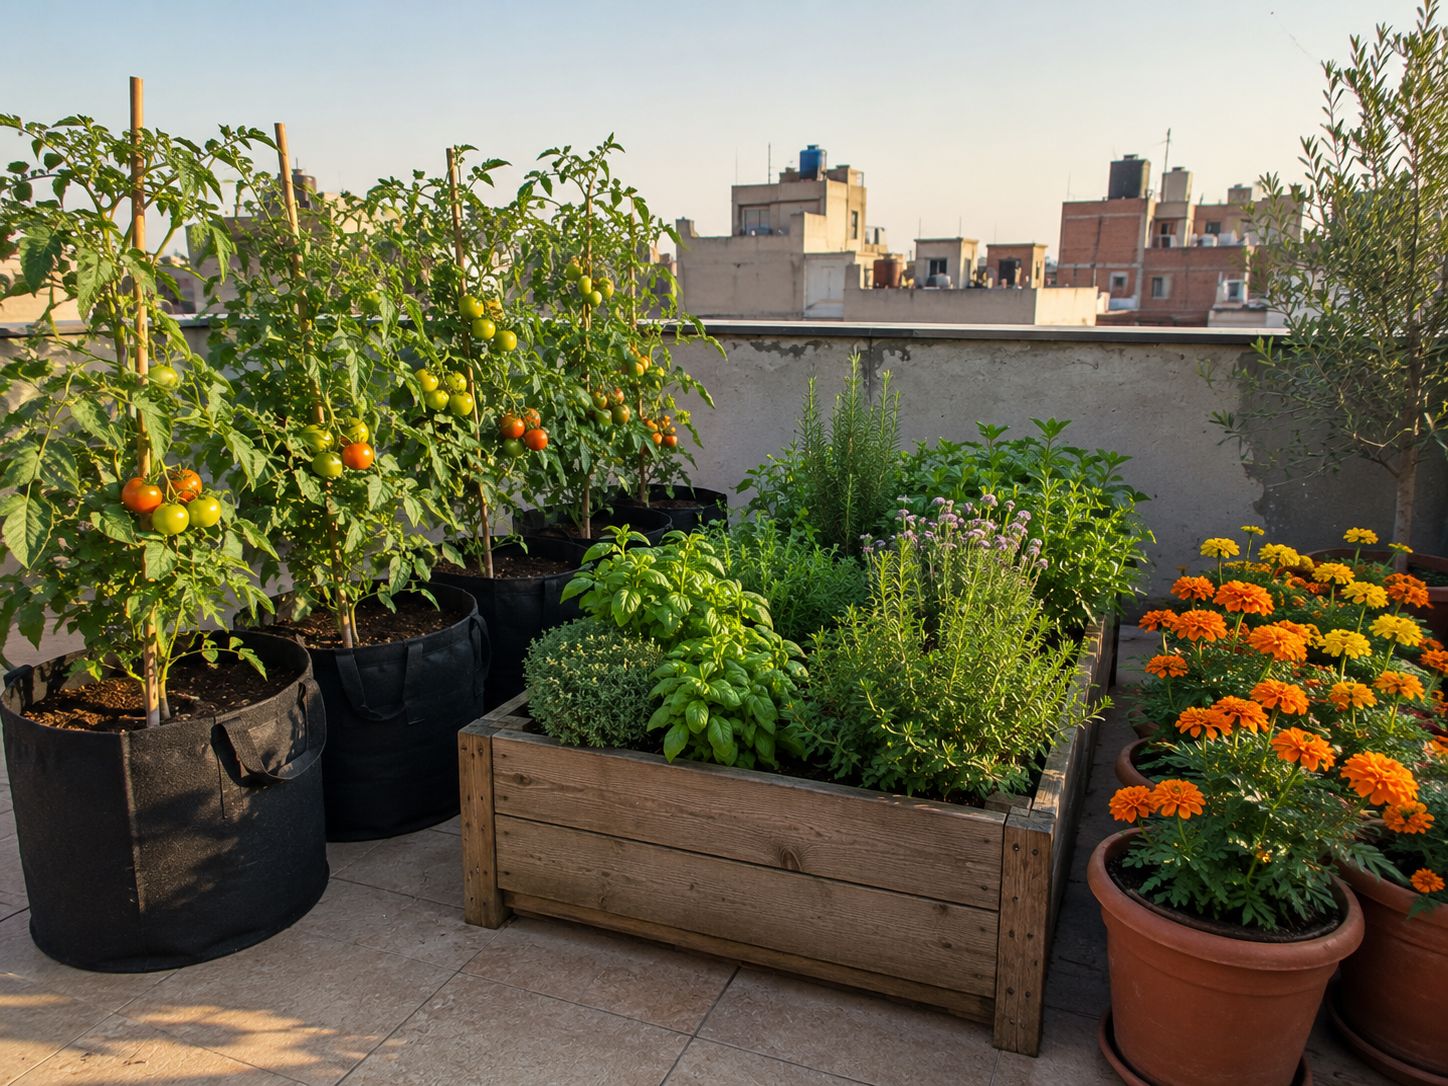
The container system you choose affects weight, cost, flexibility, and what you can grow. There is no single right answer — most successful rooftop gardens combine several types.
Fabric Grow Bags — Best Overall for Rooftops
Fabric grow bags are the ideal rooftop container. They are lightweight even when filled, provide perfect drainage and air pruning for roots, prevent waterlogging, and can be moved and rearranged as your garden evolves. Available in sizes from 3 to 100 litres, they suit everything from herbs to dwarf fruit trees. Their breathable walls also cool root zones through evaporation — a significant advantage in hot climates.
Raised Wooden Beds
Raised beds allow you to grow more densely, create defined garden zones, and grow root vegetables that need more soil depth. They look beautiful and create a proper kitchen garden aesthetic. The trade-off is weight — filled wooden beds are significantly heavier than individual pots, so structural assessment matters more here. Build with lightweight growing medium rather than standard soil.
Terracotta and Ceramic Pots
Terracotta breathes, regulates moisture naturally, and looks stunning on a rooftop. The drawback is weight — a large terracotta pot filled with wet soil is heavy. Use for herbs, flowers, and smaller plants where the aesthetic payoff is worth the weight. Avoid very large terracotta in structurally uncertain situations.
Self-Watering Containers
Self-watering containers with built-in reservoirs are particularly valuable on rooftops where daily watering is inconvenient. The reservoir provides several days of water uptake without manual intervention — a significant advantage when the garden is several floors up from your water source.
Step 05 — Soil for Rooftops
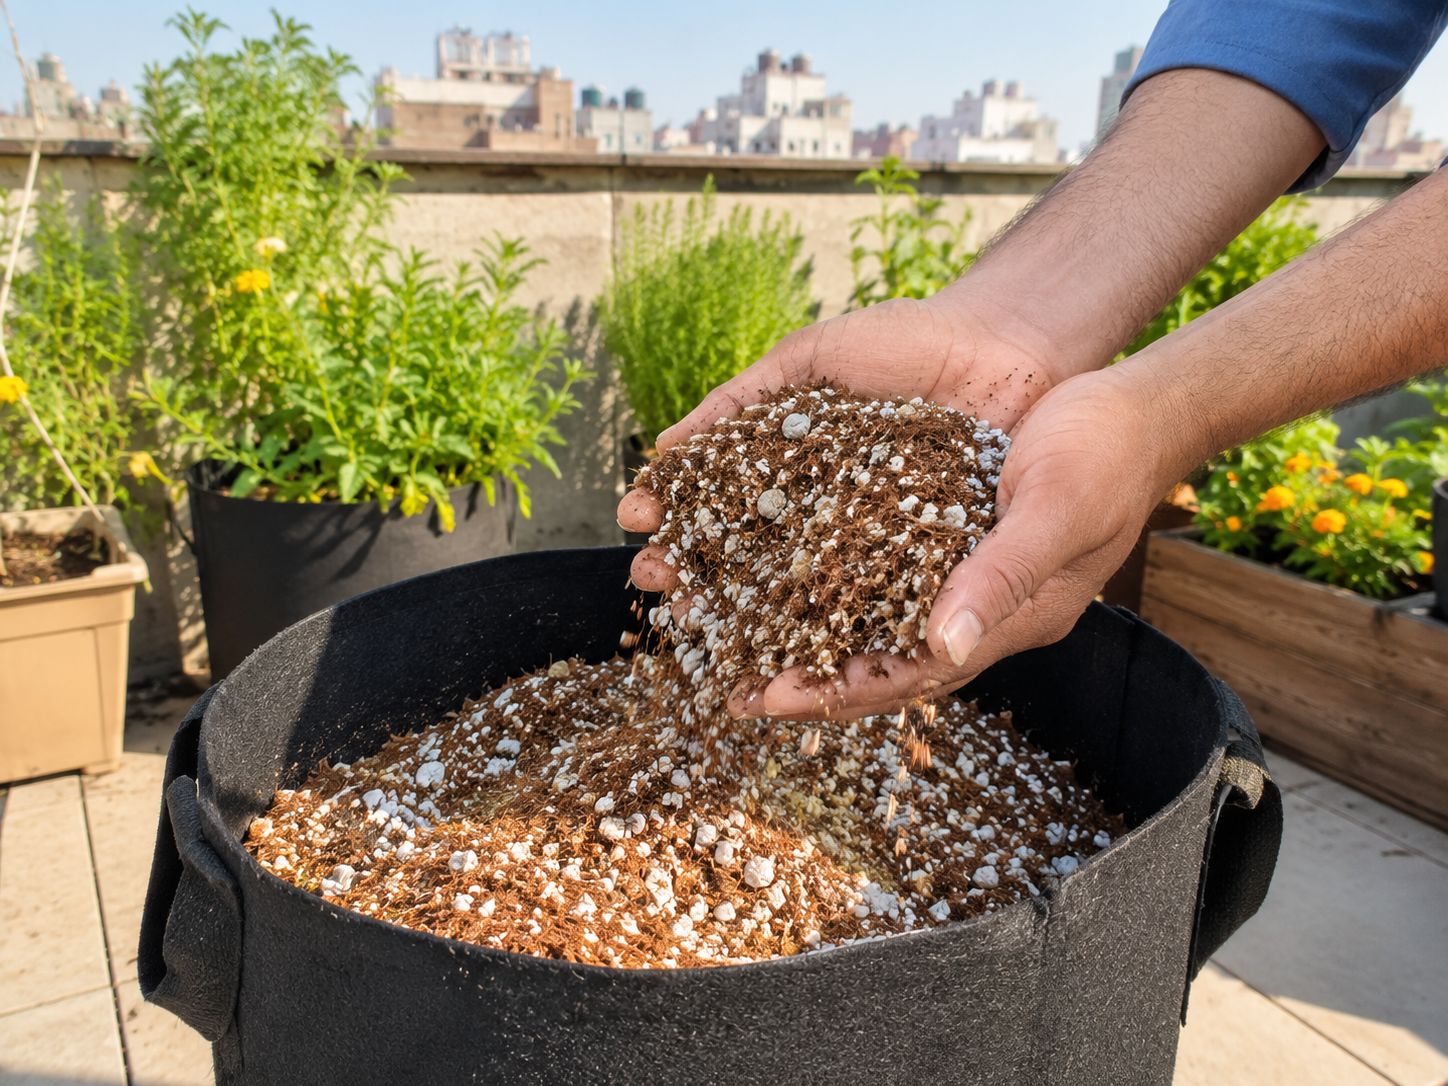
Standard garden soil dug from the ground is the wrong choice for a rooftop garden. It is too heavy, compacts in containers, and suffocates roots. Use a purpose-designed lightweight growing medium instead.
The ideal rooftop growing mix:
- 40% quality peat-free compost or coco coir
- 30% perlite or pumice for drainage and weight reduction
- 20% vermiculite for moisture retention and aeration
- 10% slow-release granular fertiliser or worm castings for nutrition
This mix weighs roughly 40–60% less than standard potting soil when dry, and drains excellently without drying out too quickly. It provides the nutrition and structure plants need while keeping the load on the roof as low as possible.
Refresh annually: Rooftop containers have finite nutrient capacity. At the start of each growing season, remove the top third of the growing medium from each container and replace with fresh compost. This replenishes nutrition and improves soil structure without fully replacing every container.
Step 06 — Water Access and Irrigation
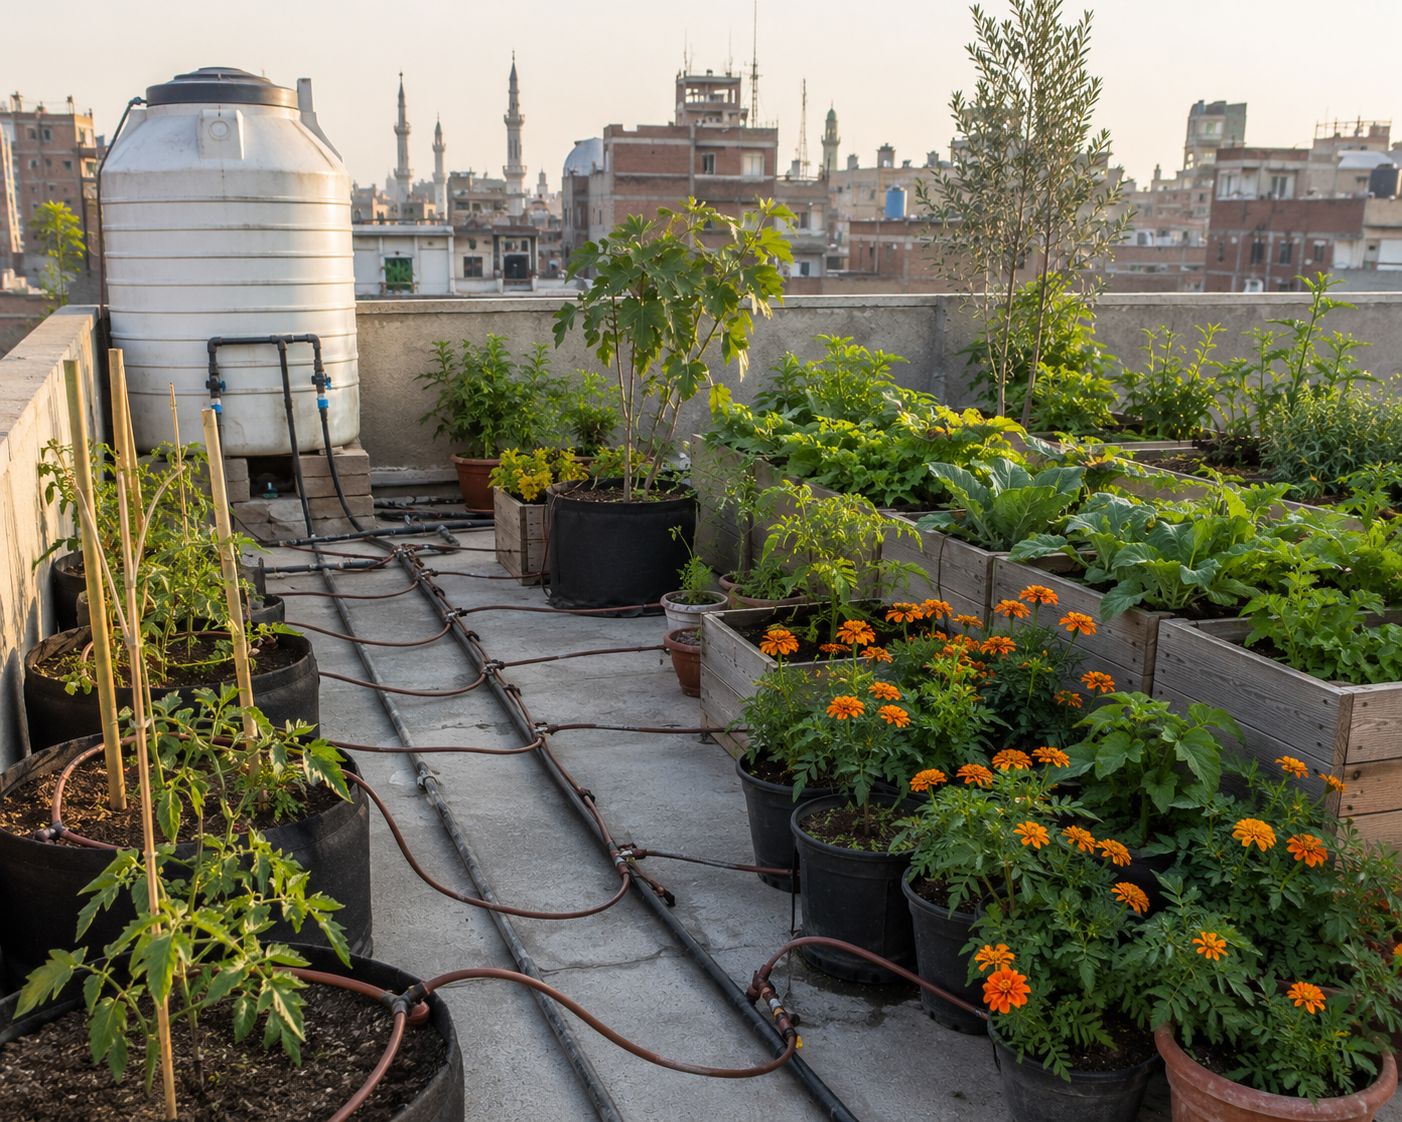
Water is the most important practical consideration in rooftop gardening — and the most commonly underestimated.
Rooftop containers in exposed, sunny, windy conditions dry out significantly faster than ground-level gardens. In hot weather, some containers may need water daily. If your only water source is a tap several floors below, carrying water upstairs by hand quickly becomes unsustainable.
Establish a water source on the roof:
The single best investment in a rooftop garden is a direct water connection to the roof — a tap, standpipe, or hose bib installed as close to the growing area as possible. If this is not possible, a large collection tank or water barrel connected to roof drainage can store rainwater for garden use.
Drip irrigation:
A simple timer-controlled drip irrigation system — available affordably at most garden centres — transforms rooftop watering from a daily chore into a once-a-week check. Thin tubing runs to each container, releasing water slowly at the root zone. This also reduces water waste significantly compared to overhead watering, which loses moisture to wind and evaporation before it reaches roots.
Rainwater harvesting:
Connect a barrel or tank to your roof's existing drainage downpipe to collect rainwater during rain events. This free water source reduces your tap water use and provides naturally soft water that plants prefer over hard tap water in many regions.
Step 07 — What to Grow
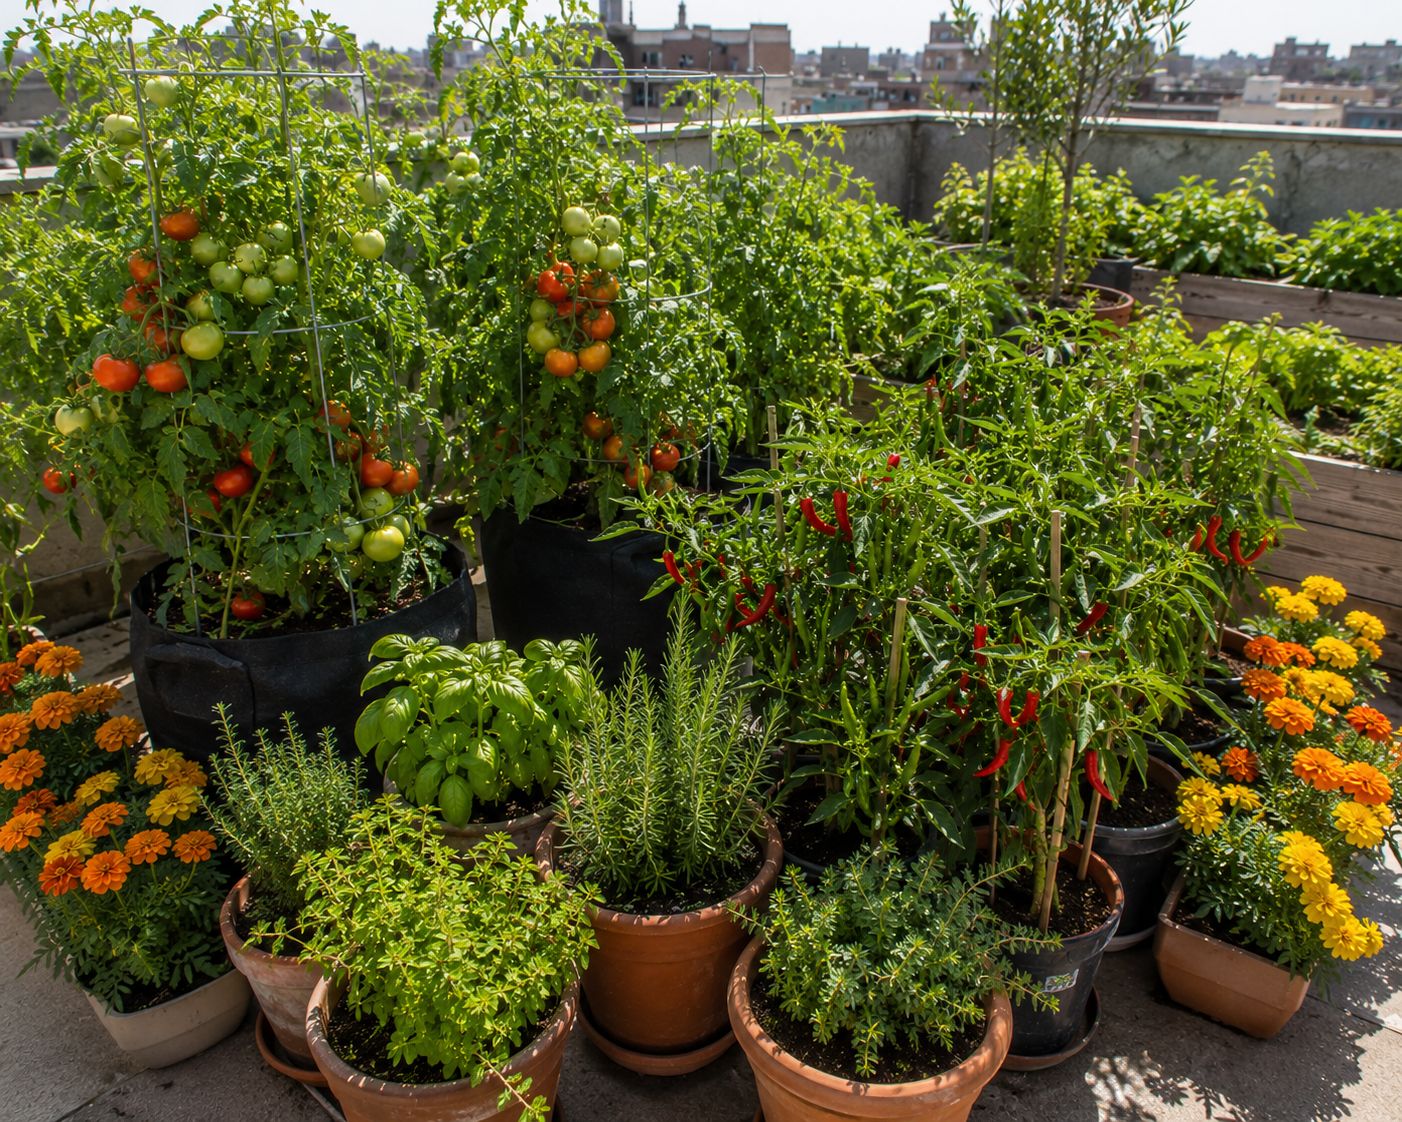
The best rooftop garden is one you actually use. Grow what your kitchen consumes — the herbs, vegetables, and fruits that appear in your cooking every week.
Best performers on rooftops:
| Category | Best Choices | Why They Work |
|---|---|---|
| Herbs | Mint, basil, coriander, thyme, rosemary, chives | Compact, productive, drought-tolerant once established |
| Fruiting vegetables | Tomatoes, chillies, peppers, aubergines | Love full sun and heat — ideal rooftop conditions |
| Leafy greens | Spinach, lettuce, rocket, kale, chard | Grow in partial shade areas, fast-cropping |
| Root vegetables | Radishes, carrots, beets, spring onions | Need deeper containers but grow well in rooftop conditions |
| Climbing plants | Cucumbers, beans, peas, gourds | Use trellises to grow vertically — maximises space |
| Flowers | Marigolds, nasturtiums, lavender | Repel pests, attract pollinators, add colour and fragrance |
| Fruit | Strawberries, dwarf citrus, figs in pots, grapevines on trellis | Long-term investment — years of fruit from established plants |
Plants to approach carefully on rooftops:
Very large trees and shrubs create structural weight and wind resistance problems. Avoid deep-rooted plants in shallow containers. Avoid plants that need consistent high humidity — the exposed rooftop environment is dry and breezy, the opposite of what humidity-lovers need.
The layered approach:
Design your rooftop in layers — tall trellised climbers at the back or perimeter, medium-height fruiting plants in the middle, low compact herbs and flowers at the edges. This creates visual depth, maximises growing surface per square metre, and uses vertical space that would otherwise be empty air.
How Much Can a Rooftop Garden Actually Lower Your Bills?
The honest, research-based numbers:
Surface temperature reduction:
A bare concrete roof in summer sun reaches 70–80°C (158–176°F). A planted rooftop stays around 25–30°C (77–86°F). That is a 40–50°C reduction in surface temperature directly above your home.
Indoor temperature reduction:
Multiple studies show indoor temperature reductions of 2°C to 11°C in the rooms directly below a rooftop garden, depending on plant coverage and climate. A Bangalore study found homeowners reporting up to 5°C reduction in cooling needs after adding rooftop gardens.
Energy savings:
Research consistently shows 20–60% reduction in upper-floor cooling energy consumption in buildings with rooftop gardens. One degree Celsius reduction in indoor temperature translates to approximately 16% reduction in air conditioning energy use.
Practical example: If your household spends the equivalent of $100 per month on cooling during summer and your rooftop garden reduces indoor temperature by 3°C, the expected cooling saving is roughly $40–50 per month. Over a 5-month summer season, that is $200–250 saved annually — every year.
Additional financial benefits beyond energy:
- Fresh produce grown on the roof reduces grocery spending
- Roof membrane lasts longer — plants protect it from UV and temperature extremes that cause most deterioration. A green roof study by the Government of Roanoke, Virginia found that a rooftop garden extended roof membrane life by 20 to 60 years
- Property value increases with well-designed outdoor green spaces
The Urban Heat Island Bonus
One rooftop garden changes the temperature of one home. But rooftop gardens at scale change the temperature of entire neighbourhoods.
The urban heat island effect describes the well-documented phenomenon where dense urban areas are measurably hotter than surrounding rural areas — sometimes by 5–10°C — because of the concentration of heat-absorbing concrete, asphalt, and building surfaces. This effect directly increases energy consumption citywide, strains electrical grids during heat events, and worsens air quality.
A city where significant proportions of rooftops are covered in plants reflects and dissipates heat rather than absorbing and retaining it. The collective evapotranspiration from thousands of rooftop gardens measurably cools local air temperatures. Cities including Singapore, Tokyo, Chicago, and London have implemented rooftop greening policies specifically for this reason.
Your individual rooftop garden is part of a solution that works at every scale — from your own electricity bill to the temperature of your street.
Common Mistakes to Avoid
| Mistake | What Happens | The Fix |
|---|---|---|
| Skipping structural assessment | Overload risk — serious safety issue | Consult a structural engineer before anything else |
| Using heavy standard garden soil | Excess weight, compaction in containers | Use lightweight rooftop growing mix |
| No windbreaks | Plants damaged, pots toppled, space unusable | Install screens on the prevailing wind side before planting |
| No dedicated water source on the roof | Daily stair-climbing with watering cans — garden abandoned | Install a tap or drip irrigation system first |
| Containers with no drainage | Root rot, roof membrane damage | All containers must have drainage holes |
| Ignoring sun mapping | Wrong plants in wrong spots, poor yields | Observe sun patterns before positioning anything |
| Planting too many large heavy containers | Structural overload | Distribute weight over load-bearing walls, go lightweight |
| Starting too large too fast | Overwhelm, abandonment | Start with 5–10 containers of what you actually cook with |
The Rooftop Garden Starter Kit
If you are starting from scratch, here is the minimum setup that gets you growing and cooling:
Week 1: Structural check + waterproofing inspection
Week 2: Install windbreaks and water source
Week 3: Set up 10 fabric grow bags with lightweight mix
Week 4: Plant herbs, chillies, tomatoes, and marigolds for first season
That is a functional, productive, cooling rooftop garden in one month of weekends. Every year it gets bigger, better, and more productive as you learn what works on your specific roof.
The concrete is already there. The sun is already hitting it. The only question is whether it heats your home all summer — or grows your food and keeps your rooms cool while it does it.
By Seedora Store — grow more, spend less, live cooler.
Explore the Instantly Grow Series for step-by-step guides on every plant mentioned in this blog — mint, coriander, chillies, tomatoes, marigolds, onions, garlic, and more.