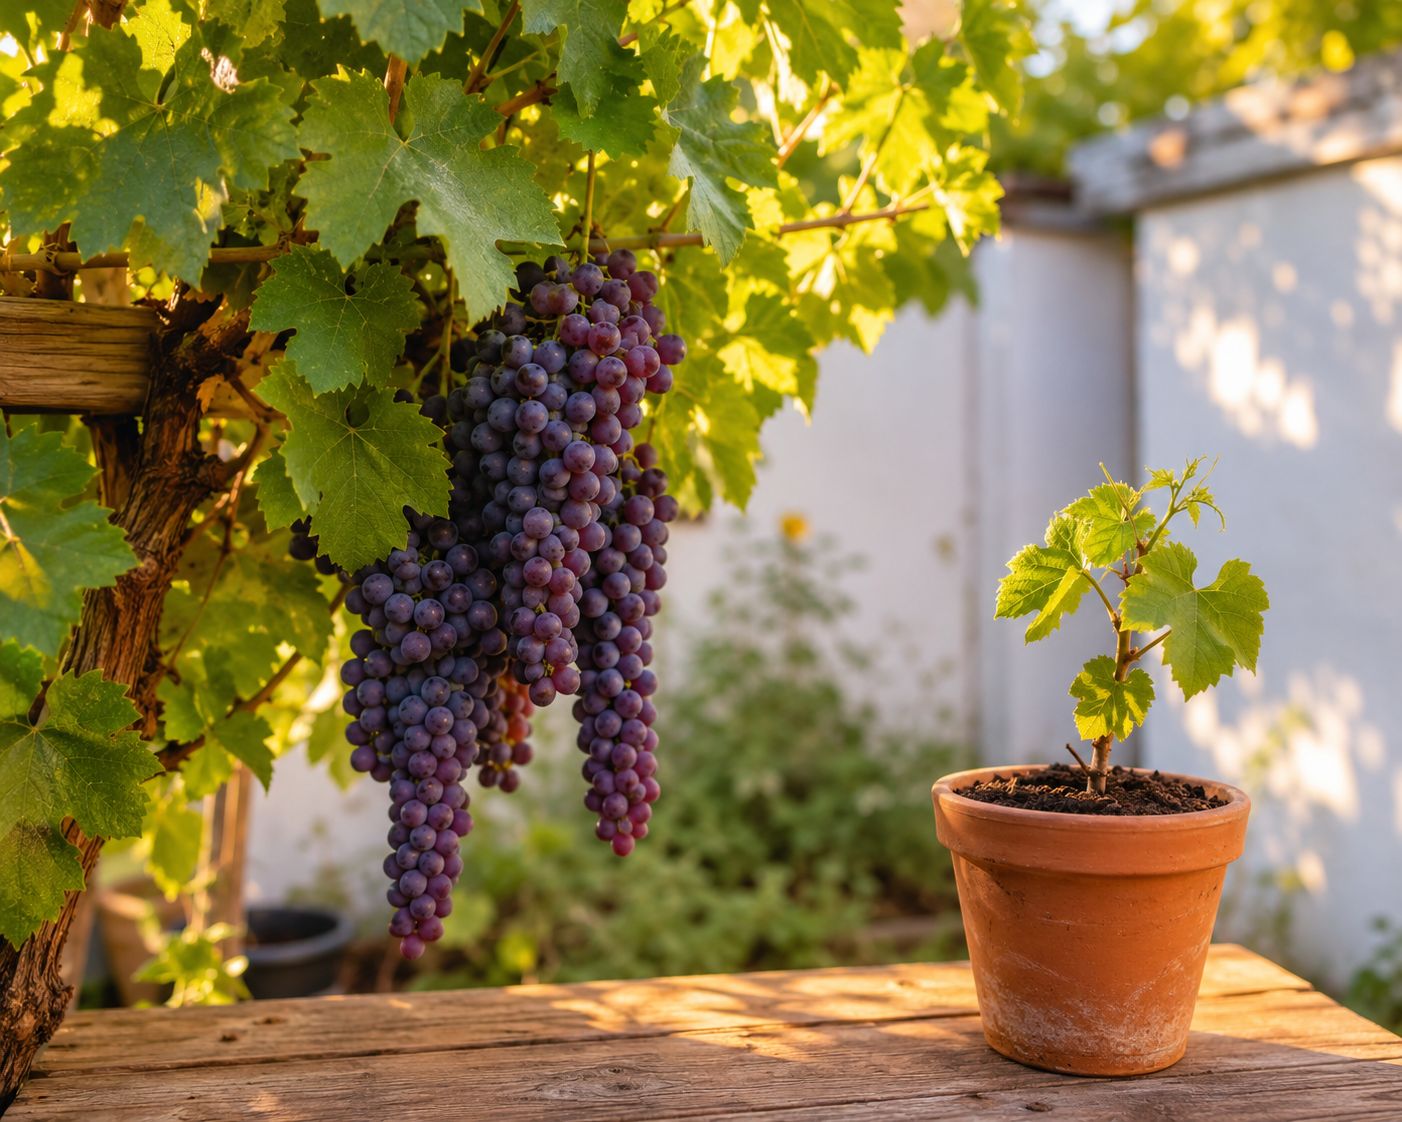
Grapes are one of the oldest cultivated fruits in human history — farming dates back over eight thousand years to the regions of modern-day Armenia and Georgia. They have been grown in home gardens, on courtyard trellises, and along sun-drenched walls for as long as people have had homes.
And yet most people assume growing grapes requires a dedicated vineyard, specialist knowledge, or expensive rootstock from a nursery.
None of that is true.
Growing grapes from cuttings is one of the simplest forms of plant propagation. A single cutting — a pencil-thick length of dormant vine with a few buds — placed in the right conditions will develop roots, push out its first leaves, and become a plant that, with patience, produces fruit for twenty to fifty years. The discarded pruning from a single vine can produce dozens of new plants. Friends with grapevines are the best source of free cuttings. The cost is essentially zero.
The catch — and it is worth saying clearly upfront — is time. A grapevine grown from a cutting typically takes two to three years before it produces its first fruit. The first year is about root establishment. The second year is about building the vine structure. The third year is when grapes begin to appear. This is a crop that rewards patience more than any other in this series.
But a plant that lives for decades and produces fruit every year from a cutting that cost you nothing? That is worth the wait.
What Is Grape Called Around the World?
| Region | Local Name |
|---|---|
| 🇬🇧 English | Grape |
| 🇵🇰 Urdu | انگور (Angoor) |
| 🇮🇳 Hindi | अंगूर (Angoor) |
| 🇸🇦 Arabic | عنب (Inab) |
| 🇮🇷 Persian / Farsi | انگور (Angur) |
| 🇫🇷 French | Raisin |
| 🇮🇹 Italian | Uva |
| 🇩🇪 German | Weintraube |
| 🇪🇸 Spanish | Uva |
| 🇵🇹 Portuguese | Uva |
| 🇹🇷 Turkish | Üzüm |
| 🇨🇳 Chinese | 葡萄 (Pútáo) |
| 🇯🇵 Japanese | ブドウ (Budō) |
| 🇰🇷 Korean | 포도 (Podo) |
| 🌐 Scientific | Vitis vinifera (European) / Vitis labrusca (North American) |
🌿 Grapes are one of the most globally cultivated fruits — grown on every inhabited continent. The Vitis vinifera species — the European grapevine — is the parent of most wine, table, and raisin grape varieties grown worldwide. Vitis labrusca, native to North America, includes popular varieties like Concord and Niagara. Both root easily from cuttings and respond well to home garden conditions with the right climate.
Does Your Climate Support Grapes?
This is the most important question before you take a single cutting. Grapes are a warm-season, sun-loving crop with specific climate requirements. Understanding whether your climate suits them saves you years of disappointment.
Ideal Climate Conditions
| Factor | Ideal Requirement |
|---|---|
| ☀️ Sunlight | Minimum 6–8 hours direct sun daily — more is better |
| 🌡️ Growing season temperature | 15–35°C (60–95°F) |
| ❄️ Winter cold | Most varieties need a cold dormant period — 7°C (45°F) or below for several weeks |
| 💧 Annual rainfall | 600–800mm ideal — well-drained conditions essential |
| 💨 Humidity | Low to moderate — high humidity invites fungal disease |
| 🌍 USDA Hardiness Zones | Most varieties: Zones 5–9 |
Climate Types That Suit Grapes
Mediterranean climates — warm dry summers, mild wet winters — are the classic grape-growing environment. Southern France, Italy, Spain, California, Chile, South Africa, southwestern Australia, and parts of the Middle East are natural homes for grapevines.
Continental climates — cold winters, warm to hot summers — work well for cold-hardy varieties. Central and Eastern Europe, the US Midwest and Northeast, Canada, central Asia, and northern China all produce excellent grapes in the right variety.
Subtropical and warm temperate zones — grapes grow year-round but require careful variety selection. Southern Asia, North Africa, the Middle East, and parts of Latin America suit short-day, heat-tolerant varieties like Muscat, Black Muscat, and local heirloom types.
Climate Challenges to Know
Too much humidity and rain: High humidity during the growing season creates ideal conditions for powdery mildew, downy mildew, and botrytis — the main fungal diseases that attack grapes. In humid climates, choose disease-resistant varieties and ensure excellent air circulation around vines.
No cold winter: Most European Vitis vinifera varieties require a period of cold dormancy to reset their flowering cycle. Without a cold winter, they may grow leaves continuously but fruit poorly. If you live in a frost-free climate, look specifically for low-chill or tropical grape varieties — they exist and fruit well in warm year-round conditions.
Extreme summer heat above 38°C (100°F): Vines tolerate heat well but very high temperatures combined with water stress causes berry shrivelling and sunburn. Afternoon shade or irrigation during heat peaks helps significantly.
💡 Quick check: If wine grapes, table grapes, or raisins are commercially produced within 500 km of where you live, your climate suits grapevines. If nobody grows grapes near you, research specifically why before investing years into a vine.
Which Variety Should You Grow?
| Category | Popular Varieties | Best For | Climate |
|---|---|---|---|
| Table Grapes | Thompson Seedless, Flame Seedless, Crimson Seedless, Muscat | Eating fresh, gifting, home garden beginners | Mediterranean, subtropical |
| Wine Grapes | Cabernet Sauvignon, Merlot, Pinot Noir, Chardonnay, Sauvignon Blanc | Winemaking, advanced growers | Mediterranean, continental |
| Raisin Grapes | Muscat of Alexandria, Fiesta, Zante Currant | Drying, preserving | Warm dry climates |
| Cold-Hardy | Concord, Niagara, Marquette, Frontenac | Northern climates with hard winters | Continental, Zones 4–6 |
| Seedless Table | Himrod, Reliance, Venus | Home eating, kids | Wide range of climates |
💡 For beginners, start with table grape varieties. They grow easily, produce reliably, and reward you with fruit you can eat directly without winemaking equipment or specialist knowledge. Thompson Seedless and Flame Seedless are two of the most widely grown home garden varieties in the world for good reason.
Hardwood vs Greenwood Cuttings — Which Method?
Grapes can be propagated two ways from cuttings. Understanding the difference lets you choose the right method for your season and situation.
| Hardwood Cuttings | Greenwood Cuttings | |
|---|---|---|
| When | Dormant season — late autumn to late winter | Growing season — late spring to early summer |
| Wood type | Last year's canes — firm, brown, pencil-thick | Current season's shoots — green, flexible |
| Success rate | Higher — most common method | Slightly lower — needs more humidity |
| Best for | Home gardeners, beginners | Multiplying plants quickly mid-season |
| Availability | Annual pruning waste — free and abundant | Year-round on an active vine |
For most beginners, hardwood cuttings taken during dormant pruning are the easiest, most reliable, and most available method. The rest of this guide focuses on hardwood cuttings — the approach used by home gardeners and small vineyards worldwide.
Step 01 — Taking the Cutting
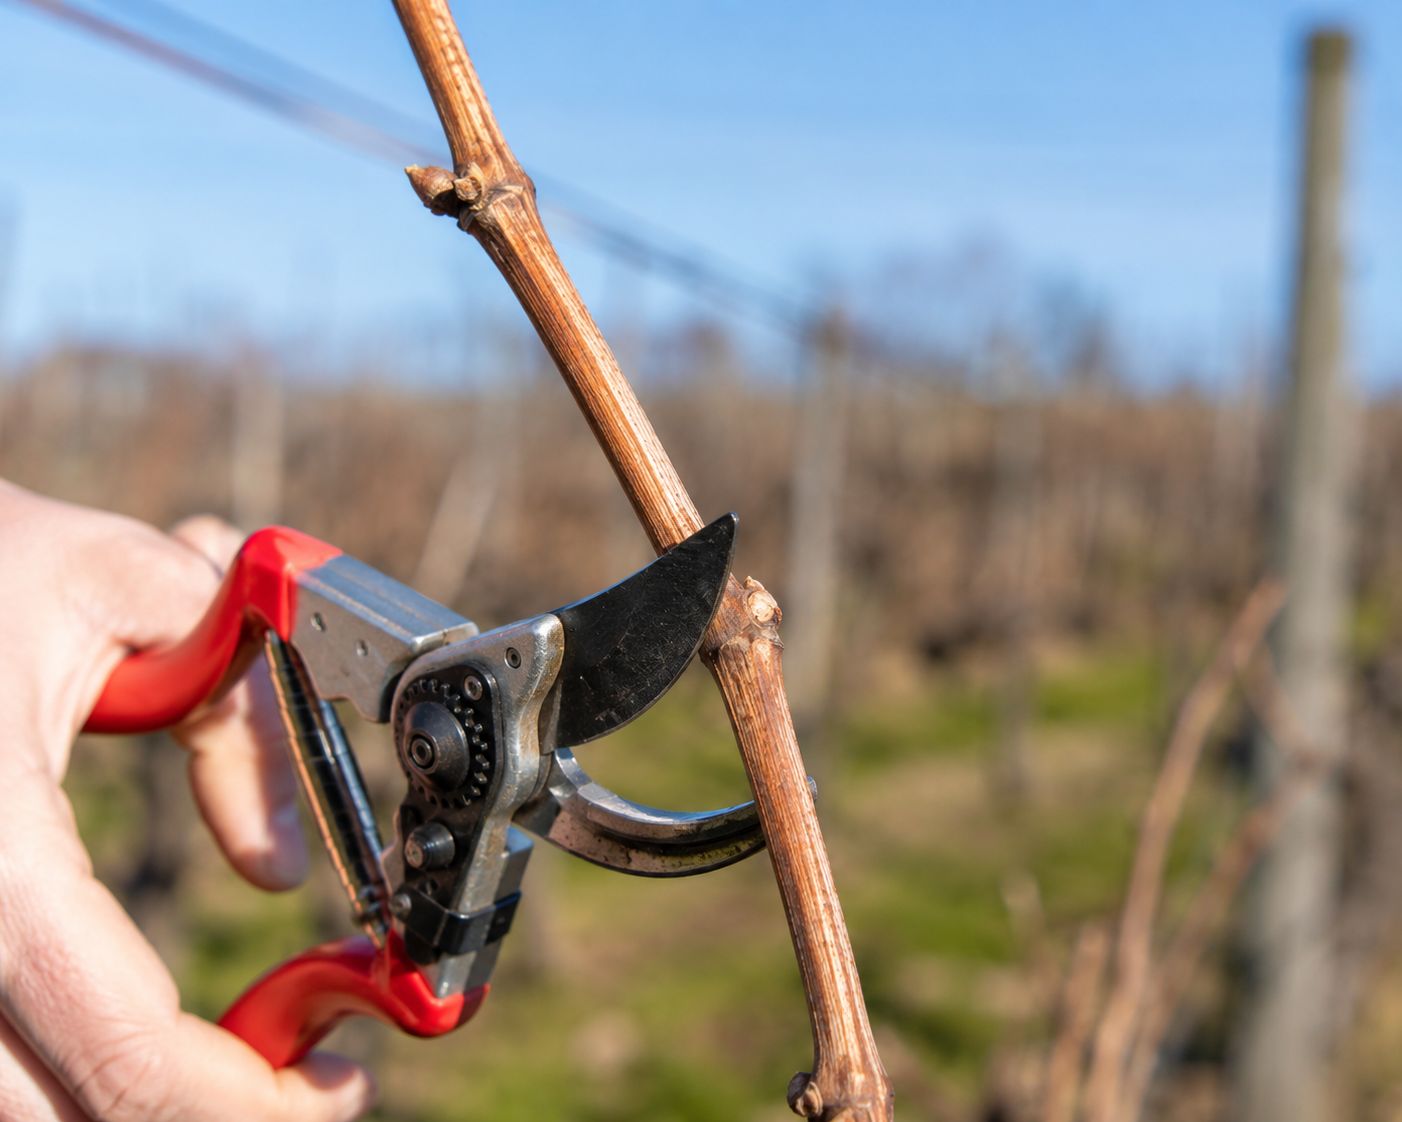
When to take cuttings:
The best time is during the dormant season — after leaves have fallen in autumn and before new buds break in spring. This window is typically November through February in the Northern Hemisphere and May through August in the Southern Hemisphere. Dormant vines have stored maximum energy in their canes — that stored energy is what fuels root development in your cutting.
What to look for on the vine:
Choose canes from healthy, productive vines that fruited well the previous season. The ideal cutting material is wood from the current year's growth — firm, pencil-thick (about 6–12 mm / ¼–½ inch diameter), reddish-brown in colour, with clearly visible nodes (the small bumps along the cane where buds and leaves emerge).
Avoid oversized, thick "bull canes" with very long internodes — they root poorly. Avoid soft, thin, immature tips. The mid-section of a long cane is usually the best material.
How to cut:
Each cutting should be 30–45 cm (12–18 inches) long and contain at least 3 to 4 nodes — though more nodes mean more potential rooting and budding points. Use clean, sharp bypass pruners wiped with rubbing alcohol before cutting to prevent spreading disease between plants.
Make a 45-degree angled cut at the top of the cutting — this identifies which end is up and helps shed water away from the bud. Make a straight, flat cut at the bottom — this is the end that roots.
Remove any tendrils or side shoots from the cutting. Keep the nodes intact — they are where roots and shoots will emerge.
⚠️ Critical — know which end is up. Planting a grape cutting upside down is the most common beginner mistake. The angled cut is always the top. The flat cut is always the bottom, going into soil. Marking the top cut with a small notch or coloured tape before bundling cuttings together prevents confusion.
Step 02 — Store or Plant Immediately
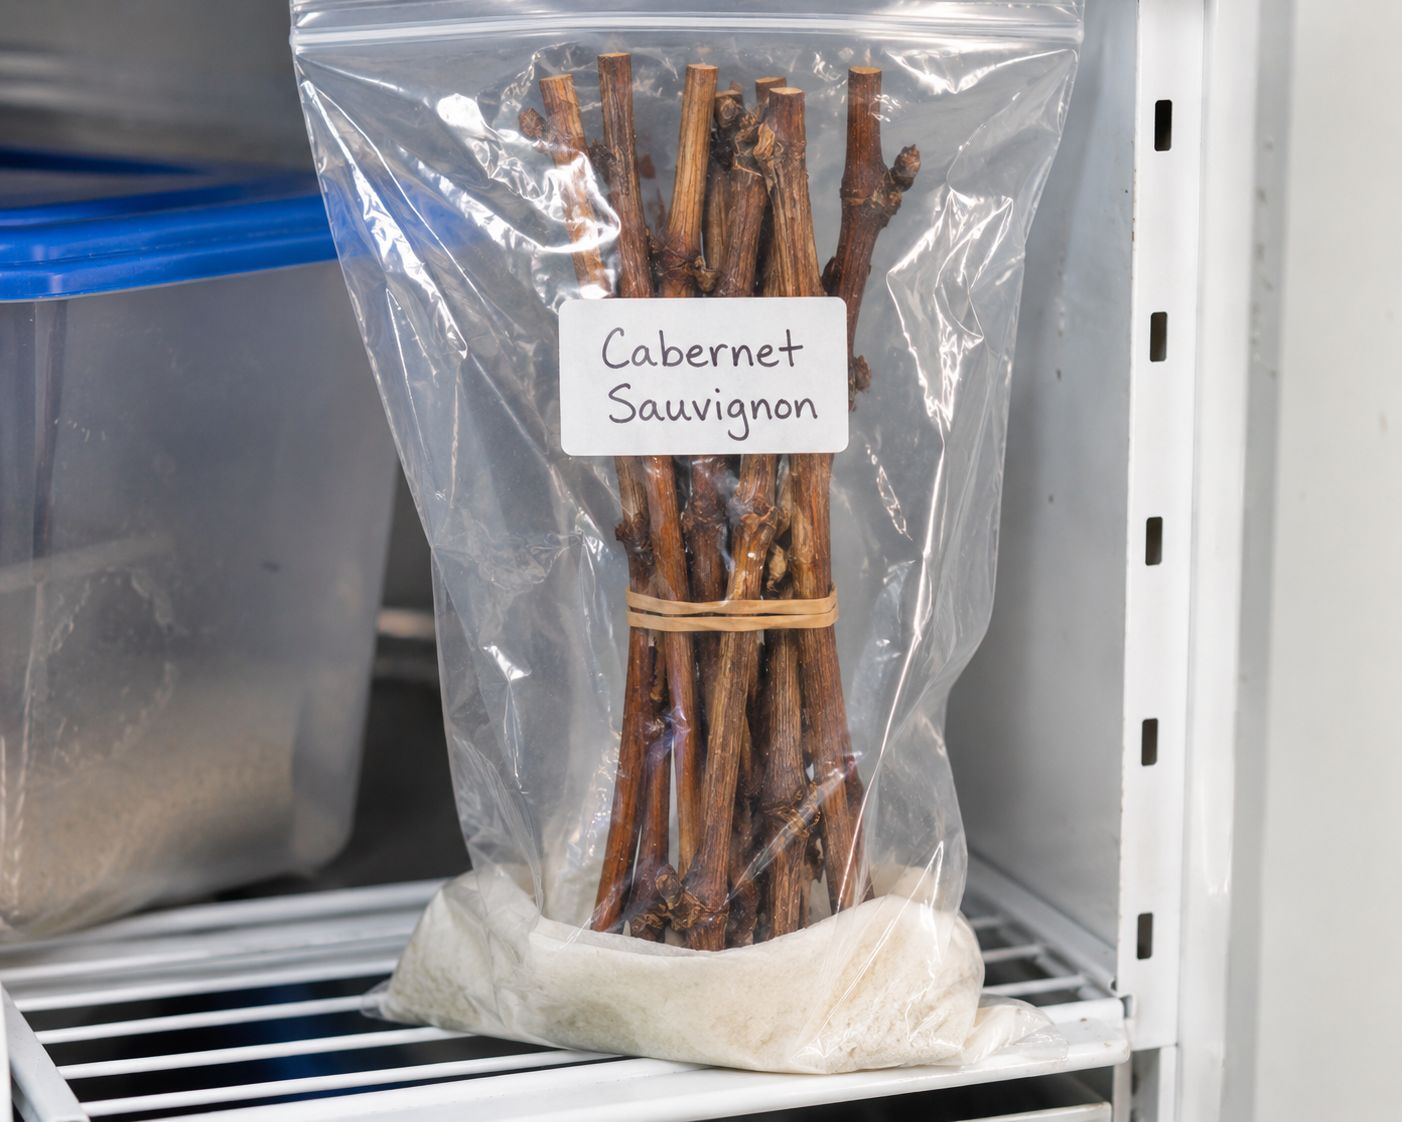
You have two options after cutting.
Option A — Plant Immediately
If your conditions are right — temperatures consistently above 15°C (60°F) and planting site ready — plant cuttings directly into pots or the ground. This works well in mild winter climates where the ground does not freeze and spring conditions arrive early.
Option B — Cold Store Until Spring
In climates with hard winters, store cuttings in the cold until the ground is workable and frost risk is passing. Bundle cuttings together, wrap the base ends in slightly damp paper towel or burlap, seal loosely in a plastic bag, and store in a cool dark place — a refrigerator, cool garage, or cellar at 1–7°C (34–45°F). Cuttings stored this way keep for several months.
The timing goal is to have the cutting's base warming and forming roots before the buds break into leaf. If the buds open and leaves develop before roots are established, the cutting burns through its stored energy feeding leaves it cannot yet support — and dies. Cold storage controls this timing.
Step 03 — Prepare the Cutting for Planting
![Hands preparing a grape cutting — scraping the bottom 5cm of bark with a knife to expose green cambium layer, and dipping the bottom end into a small jar of rooting hormone powder, white surface, bright natural light, close-up educational photography]
(https://cbifwupdbtzarelgapqj.supabase.co/storage/v1/object/public/blog-images/how-to-grow-grapes-from-cuttings/1783319072234.png)
Two to six weeks before your last frost date — or when you are ready to plant in mild climates — prepare your cuttings for rooting.
Soak in water:
Stand cuttings base-down in a bucket or jar of clean water for 12 to 24 hours before planting. This rehydrates the canes after storage and signals the dormant tissue that growing conditions are arriving.
Wound the base (optional but effective):
Lightly scrape the bark from the bottom 5 cm (2 inches) of the cutting with a knife to expose the green cambium layer beneath. This wounded surface significantly increases the surface area from which roots can emerge and is particularly useful for varieties that root more slowly.
Apply rooting hormone (optional but helpful):
Dip the base of the cutting into rooting hormone powder or gel — tap off any excess. Rooting hormone contains auxins that stimulate root cell development and increases both rooting speed and success rate. It is not essential — many grapes root without it — but it meaningfully improves results, especially for less vigorous varieties.
Step 04 — Plant and Root
![Grape cutting inserted into a deep narrow pot filled with a mixture of potting soil and perlite, two nodes buried below soil level, one or two nodes visible above, covered with a clear plastic bag to maintain humidity, on a warm bright windowsill]
(https://cbifwupdbtzarelgapqj.supabase.co/storage/v1/object/public/blog-images/how-to-grow-grapes-from-cuttings/1783319240698.png)
Pot and soil:
Use a deep, narrow pot — at least 30 cm (12 inches) deep — to give the developing roots room to grow downward. Fill with a well-draining mix of 50% potting soil and 50% perlite or coarse sand. This mix stays loose, allows air to reach the developing root zone, and drains quickly so the base of the cutting does not sit in moisture.
Planting depth and position:
Insert the cutting into the soil with the flat base end down, burying at least two nodes below the soil surface and leaving one or two nodes above the soil. The buried nodes are where roots emerge. The nodes above soil are where shoots and leaves will appear.
Firm the soil gently around the cutting to ensure contact between the cutting and the growing medium — air pockets around the base slow or prevent rooting.
Creating a humid environment:
Cover the pot with a clear plastic bag or an upturned clear plastic bottle to create a humidity dome around the cutting. This prevents the cutting from drying out while roots develop. The cutting has no roots yet — it cannot absorb water from the soil — so keeping the air around it humid is the only way it stays hydrated.
Place in a warm location — ideally 20–25°C (68–77°F). A bright windowsill, a warm greenhouse shelf, or on top of a refrigerator (which generates gentle bottom heat) all work well. Keep out of direct harsh sun at this stage — the cutting needs warmth, not intense light that accelerates moisture loss.
The waiting period:
Roots typically develop within 4 to 8 weeks. You will see small green buds beginning to swell and push open at the upper nodes — this is a positive sign but does not confirm roots yet. The real confirmation comes when you see steady new leaf growth developing — a plant producing consistent new leaves is drawing water and nutrients through roots.
Check the soil moisture every few days and mist lightly if the surface feels completely dry. Do not water heavily — the cutting does not need much moisture and waterlogged conditions cause the base to rot before roots form.
💡 The tug test: After 6 weeks, give the cutting a very gentle upward tug. If it resists firmly — roots have anchored it. If it slides out easily — not ready yet. Replace it, keep waiting, and check again in two weeks.
Step 05 — Harden Off and Transplant
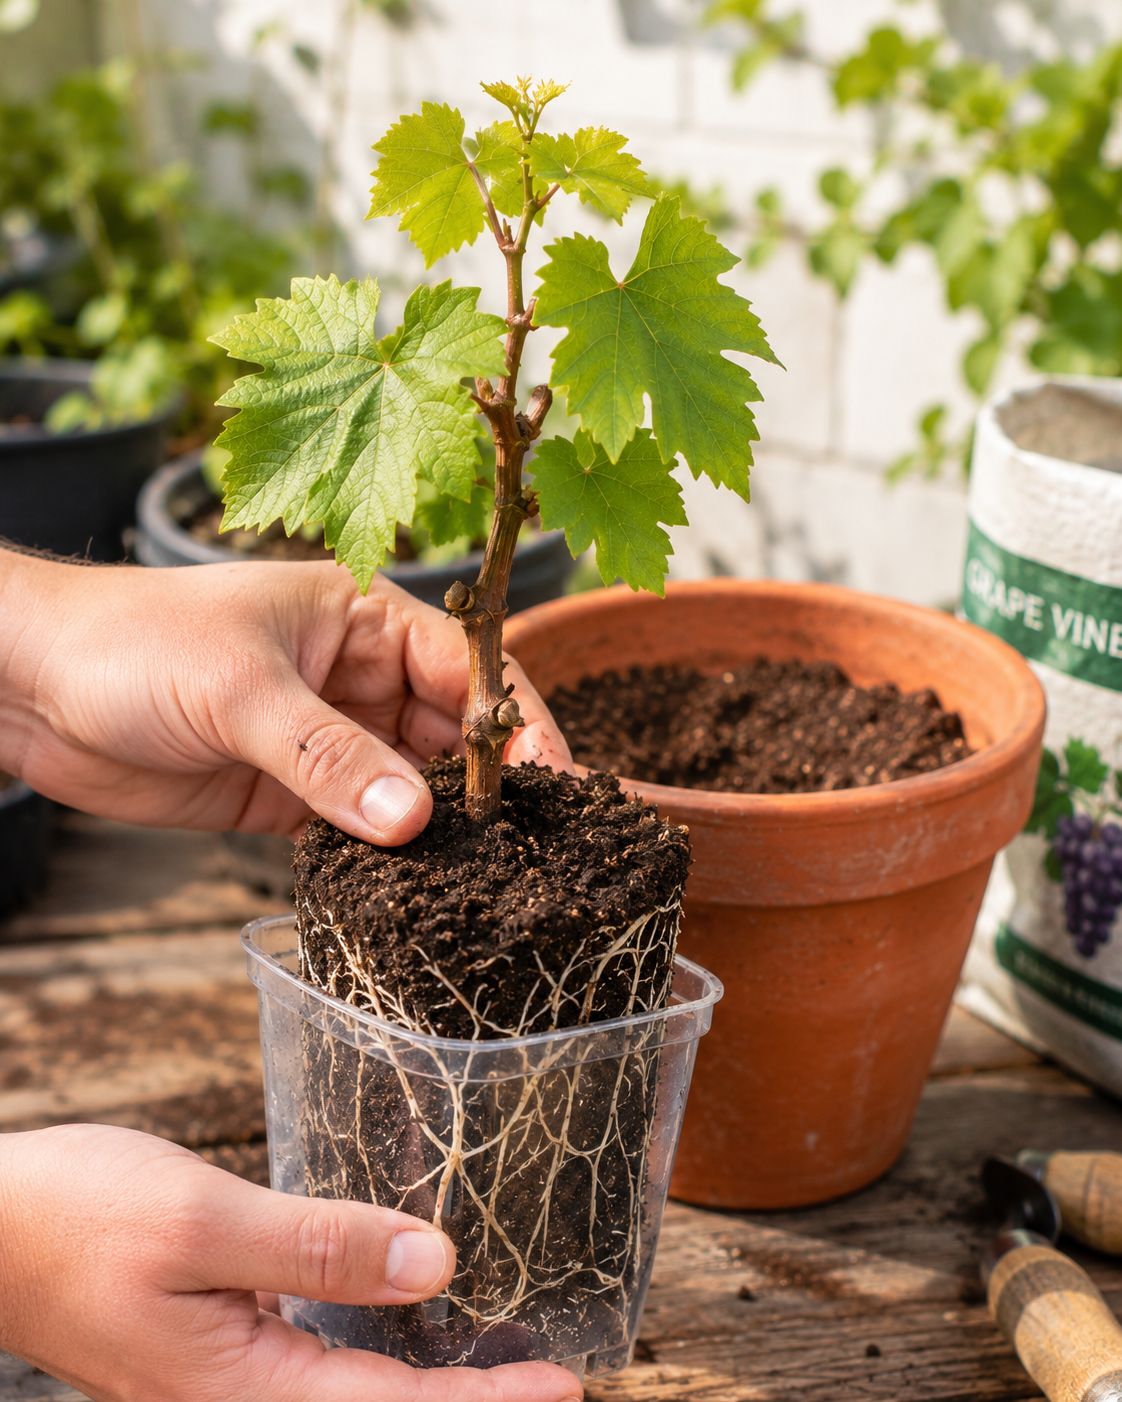
Once your cutting has a visible root system and has produced two to three sets of healthy leaves — it is ready to move to its permanent location. But do not rush this transition.
Hardening off:
If your cutting was rooted indoors, it needs to adjust gradually to outdoor conditions — sun intensity, wind, and temperature variation. Place it outside for two to three hours in the morning shade on the first day. Increase outdoor time by an hour or two each day over one to two weeks. By the end of this process the plant is ready for full outdoor exposure.
Transplanting:
Choose a permanent location with full sun — at least 6 to 8 hours of direct sunlight daily. Grapes planted in part shade grow healthily but fruit poorly. The sunniest wall or fence in your garden is the ideal spot.
Dig a planting hole 45–60 cm (18–24 inches) wide and deep. Mix the removed soil with generous amounts of compost or aged manure. Plant the vine at the same depth it grew in its pot. Backfill, press gently to eliminate air pockets, and water thoroughly.
Spacing:
If planting multiple vines, space them at least 1.5–2.5 metres (5–8 feet) apart. Grapevines spread significantly as they mature — crowding produces poor fruit and increases disease risk by reducing airflow between plants.
Step 06 — Trellis, Training, and the First Two Years
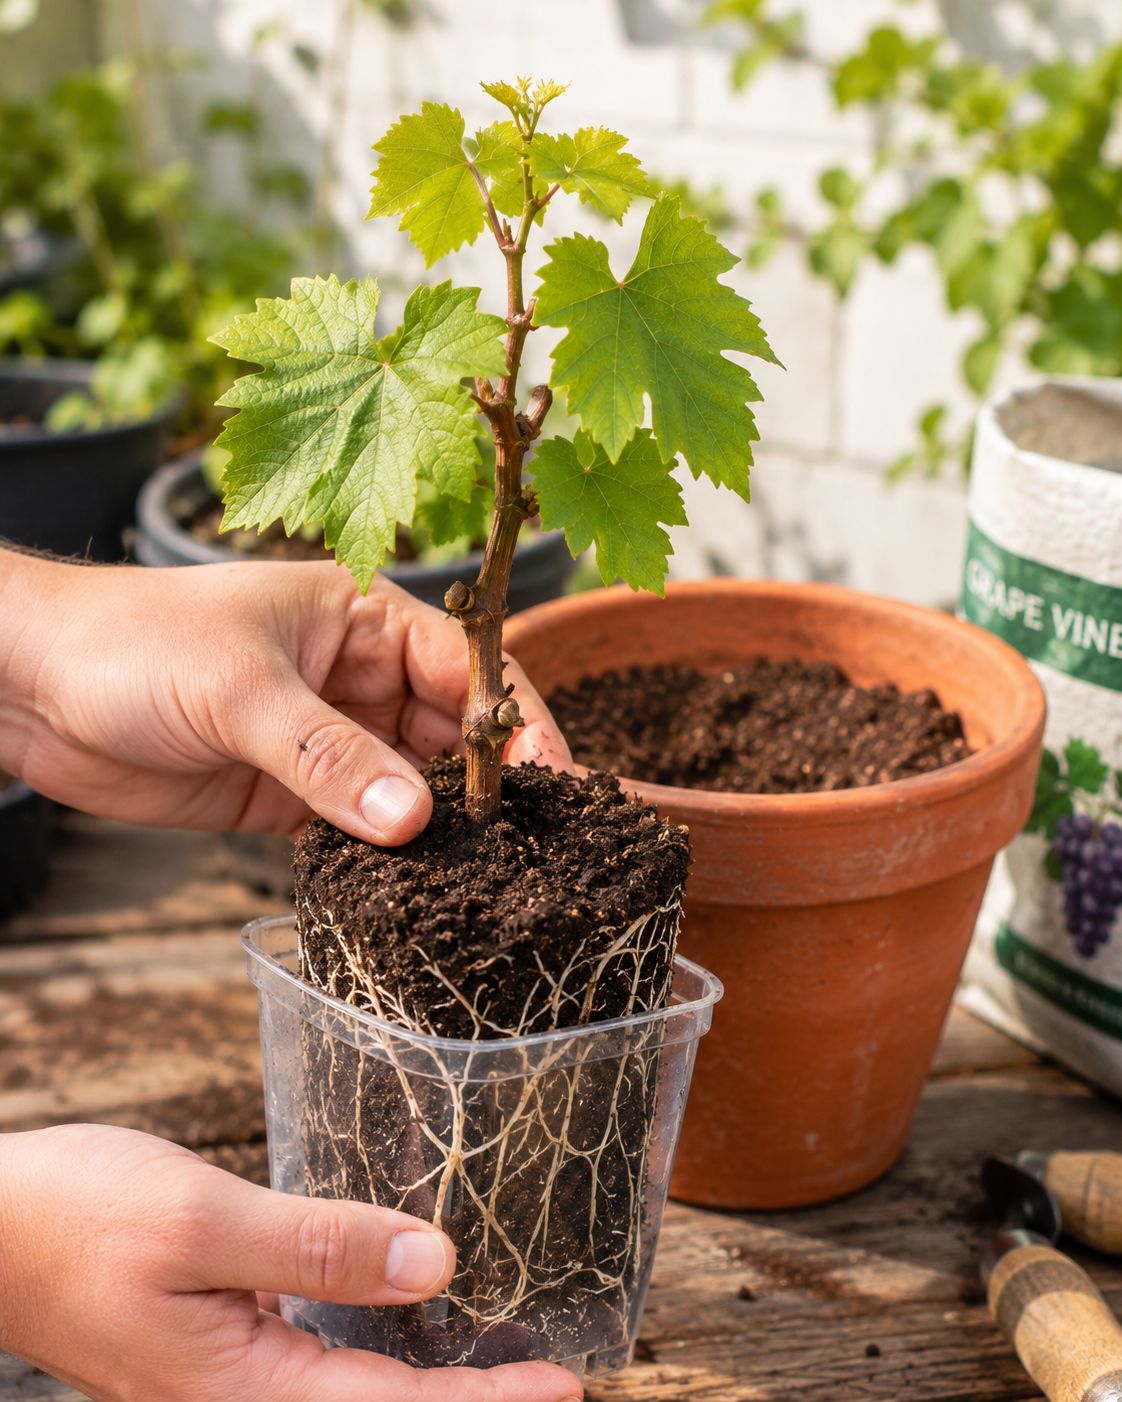
Grapes are climbing vines. They need support. Without a trellis or strong structure, they sprawl across the ground, tangle themselves, and fruit poorly.
Set up support before or at planting:
A simple structure of wooden posts with horizontal wires spaced 30–45 cm (12–18 inches) apart is the standard home garden trellis. A sunny fence, a pergola, or a garden wall with wires attached all work beautifully.
Year One — establishment:
The first year is entirely about root development. Do not expect fruit. Do not try to force it. Let the vine grow freely — select the strongest shoot and train it upward along your support structure. Pinch off any flowers that appear in year one — they waste energy the plant needs for establishing its root system.
Year Two — building structure:
In late winter of the second year, prune back to two or three strong canes. Train these along the trellis wires. The vine is building its permanent framework. Some vines produce a small amount of fruit in year two — this is fine to leave on, but do not expect a full harvest.
Year Three onward — fruiting begins:
This is when patience is rewarded. A well-established, properly trained grapevine produces its first meaningful harvest in year three. From this point, annual pruning in late winter — cutting back previous season's canes to maintain shape and encourage new fruiting wood — keeps the vine productive for decades.
Step 07 — Care, Watering, and Feeding
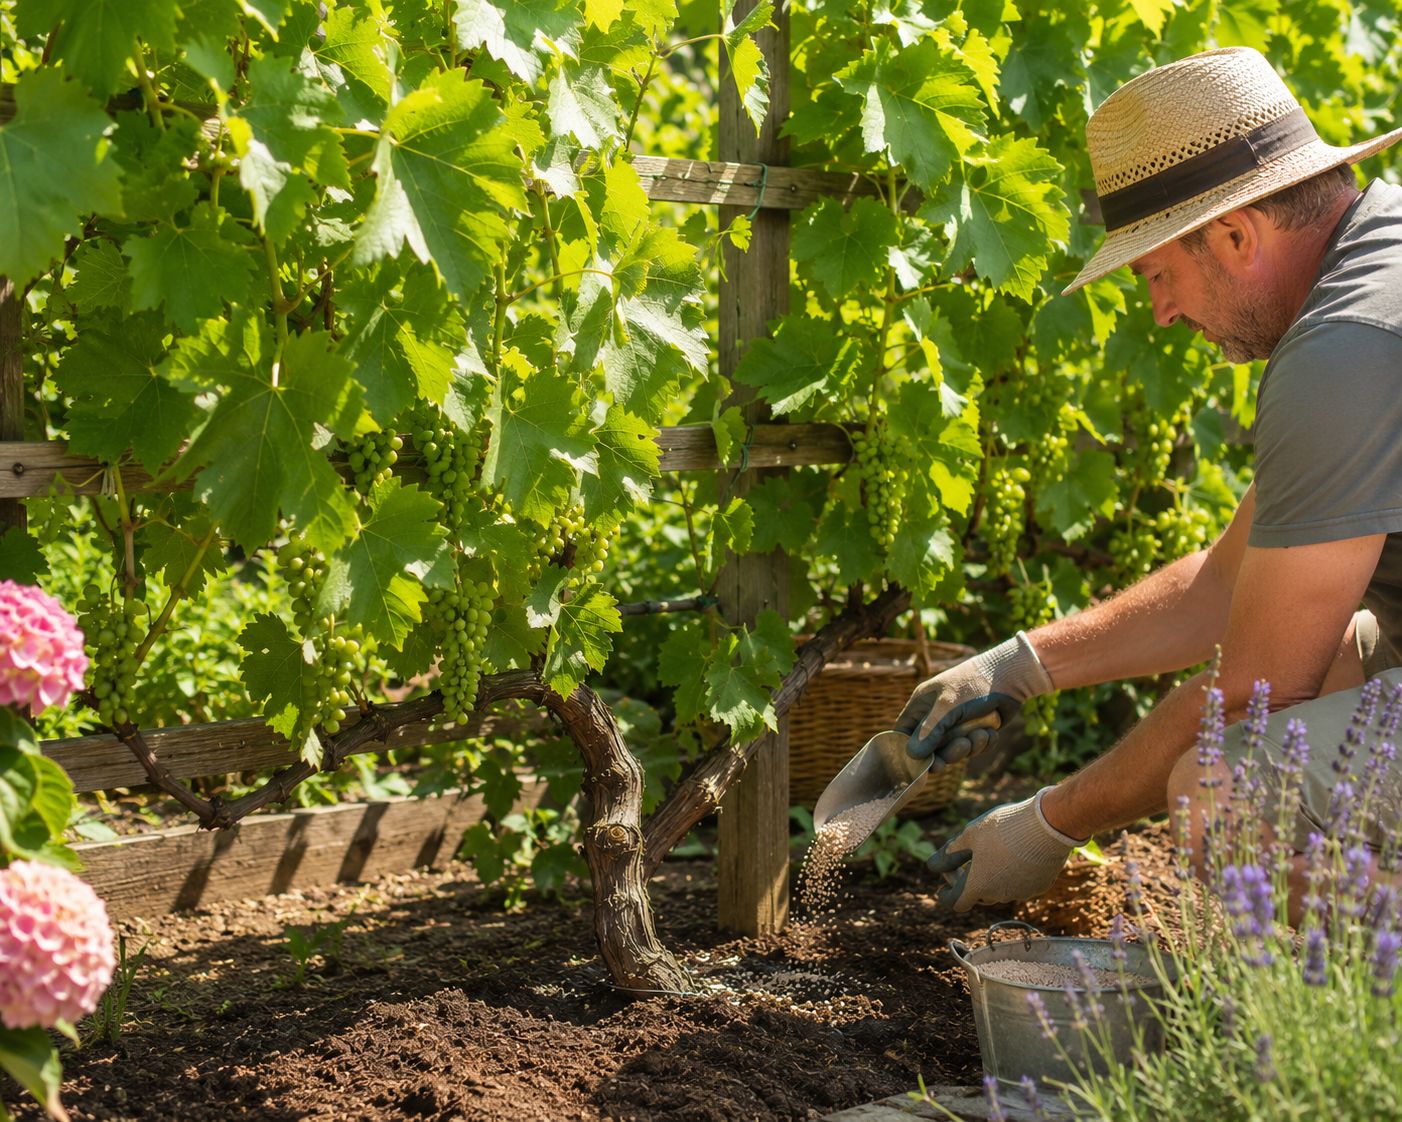
Watering:
Young vines in their first year need consistent moisture while roots establish — water deeply once or twice a week depending on conditions. Once established after the first full season, grapevines are surprisingly drought-tolerant — their deep root systems access water far below the surface. In dry climates, deep watering every one to two weeks during the growing season is sufficient. In humid climates, natural rainfall often provides enough.
Feeding:
Feed in early spring as new growth begins with a balanced fertiliser. As the growing season progresses and fruit develops, switch to a low-nitrogen, high-potassium feed to support fruit development rather than excessive leaf growth. Avoid heavy nitrogen feeding — it pushes vigorous vegetative growth at the expense of fruit quality and quantity.
Pruning — the essential annual task:
Annual pruning in late winter while the vine is dormant is the single most important maintenance task for productive grapevines. An unpruned vine becomes a chaotic tangle that produces small, poor-quality fruit. A well-pruned vine concentrates its energy into a controlled number of high-quality clusters.
The two standard pruning approaches are cane pruning (selecting one to two strong canes and cutting to a few buds each year) and spur pruning (cutting back all previous year's growth to short two to three bud spurs along permanent arms). The right approach depends on your variety — research your specific type before pruning for the first time.
Pest and disease watch:
The main threats to home grapevines are powdery mildew (white powdery coating on leaves and fruit — treat with bicarbonate of soda spray or neem oil), downy mildew (yellow patches on leaves, grey fuzz underneath — improve airflow, apply copper-based fungicide), aphids (clusters on new growth — neem oil or insecticidal soap), and Japanese beetles in North America (hand-pick or use neem oil). Good air circulation between vines and avoiding overhead watering prevents most fungal issues before they start.
When and How to Harvest
Grapes do not continue ripening after picking — unlike some fruits that sweeten off the vine. This means the timing of harvest is critical. Harvest too early and grapes are sour and astringent. Harvest at the right moment and they are perfectly balanced, sweet, and rich.
The reliable test is taste — eat a berry from the cluster. If it tastes the way you want it to taste, the cluster is ready. Visual cues support this: colours deepen fully, the skin feels slightly soft, and the berries separate from the cluster with gentle pressure.
Cut whole clusters with sharp scissors rather than pulling individual berries. Handle gently — bloom, the natural waxy coating on grapes, is easily rubbed off and protects the fruit.
Fresh grapes store in the refrigerator for one to two weeks. Excess harvest can be frozen, juiced, dried into raisins, made into jam, or — for the adventurous — fermented into wine.
Common Mistakes to Avoid
| Mistake | What Happens | The Fix |
|---|---|---|
| Planting cutting upside down | No roots, no growth | Angled cut = top, flat cut = bottom, always |
| Taking cuttings in the wrong season | Poor rooting, cutting dies | Dormant season only for hardwood cuttings |
| Not enough nodes on cutting | Insufficient rooting points | Minimum 3–4 nodes per cutting |
| Too much moisture during rooting | Base rots before roots form | Keep soil barely moist — not wet |
| Moving from indoors to full sun immediately | Leaf scorch, shock | Harden off over one to two weeks |
| Expecting fruit in year one or two | Disappointment | Grapes fruit meaningfully in year three |
| Not pruning annually | Tangled unproductive vine | Prune every late winter without exception |
| Skipping trellis setup | Sprawling, tangled growth, poor fruit | Install support at or before planting |
Quick Care Summary
| Care | Requirement |
|---|---|
| ☀️ Sunlight | Full sun — 6–8 hours minimum |
| 💧 Watering | Deep, infrequent — established vines drought-tolerant |
| 🌡️ Temperature | 15–35°C growing season — cold dormancy needed for most varieties |
| 🌍 Climate | Mediterranean, continental, warm temperate — check your zone |
| 🪴 Cutting size | 30–45 cm, pencil-thick, 3–4 nodes minimum |
| ✂️ Best cutting time | Dormant season — late autumn through late winter |
| 🌱 Rooting time | 4–8 weeks |
| 🍇 First fruit | Year 2–3 after planting |
| ✂️ Annual pruning | Every late winter — essential for productivity |
| 📦 Harvest timing | Taste test — grapes do not ripen off the vine |
Part of the Instantly Grow Series by Seedora Store — grow the fruits, herbs, and vegetables your kitchen actually uses, every single day.